Transition Terminology Matrix and Checklist
| Term | Use in T1 | Use in T2 | Time Impact |
|---|---|---|---|
| Helmet | Must be worn at all times [3] | Unclip after racking bike [2] | High |
| Mount Line | Run bike to mount line [4] | N/A | High |
| Dismount Line | N/A | Dismount before line [4] | High |
| Draft Zone | N/A | N/A | Depends on race type |
| Transition Area | Shared in shorter races [5] | Shared in shorter races [5] | Medium |
| Race Belt | N/A | Use for quick number attachment [2] | Medium |
| Wetsuit | Unzip while running [2] | N/A | Low |
| Goggles | Keep on until T1 [2] | N/A | Low |
| Sunglasses | Store in helmet [2] | N/A | Low |
| Practice | Mock races for efficiency [6] | Mock races for efficiency [6] | High |
| Glass Containers | Prohibited [4] | Prohibited [4] | High |
| Landmarks | Note for quick setup [1] | N/A | Medium |
| Essential Gear | Bring only essentials [1] | Bring only essentials [1] | High |
| Transition Flow | Rehearse flow to cut time [1] | N/A | High |
| Bike Racking | Rack before unclipping helmet [2] | N/A | High |
What Is a Triathlon Transition and Why Does It Matter?
A triathlon transition refers to the moments between the swim, bike, and run segments of the race, specifically T1 (swim-to-bike) and T2 (bike-to-run). These transitions are crucial as they can significantly impact overall race time.
Understanding T1 and T2
In T1, athletes exit the water and need to quickly prepare for the bike leg. This involves removing the wetsuit, putting on a helmet, and grabbing the bike. The rules stipulate that the helmet must be worn and securely fastened before the athlete touches the bike[3]. T2 occurs after the bike leg, where athletes must rack their bike before they can remove their helmet[2]. This sequence is vital to avoid penalties and ensure a smooth transition.
Time Impact on Race
Transition times can vary based on race distance. Average transition times are approximately 1–2 minutes for sprint triathlons, 2–3 minutes for Olympic distance, and up to 4–5 minutes for 70.3 events. While transitions might seem minor, analysis of around 18,500 Iron-distance finishes shows that transitions account for about 1.0% of total race time, but they hold a relative importance of 7.5% in determining final race order[7]. This highlights why efficient transitions are often referred to as the 'fourth discipline' in triathlon.
Importance of the Fourth Discipline
Transitions are termed the 'fourth discipline' because they require distinct skills and strategies that can influence race performance. Athletes need to practise their transitions to minimise time lost, as even a few seconds saved can make a difference in competitive scenarios. Following proper procedures, such as using a race belt for quick number attachment and rehearsing the flow from swim exit to bike mount line, can enhance efficiency[1][2].
Understanding these elements of T1 and T2 will help athletes focus on improving their transitions, ultimately leading to better race outcomes.
Triathlon Transition Areas by Race Distance
Different race distances have unique transition setups that impact how athletes prepare for each segment. Understanding these differences is crucial for optimising transition times.
Sprint and Olympic Distances
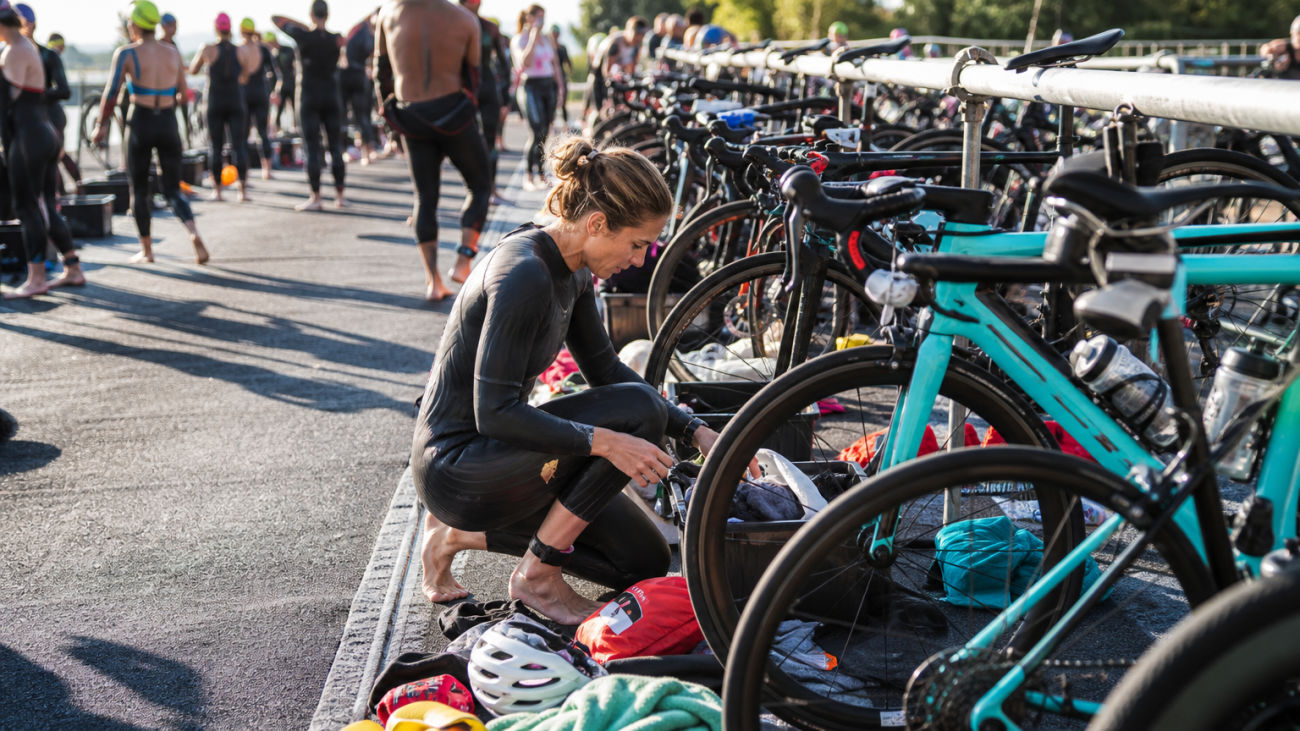
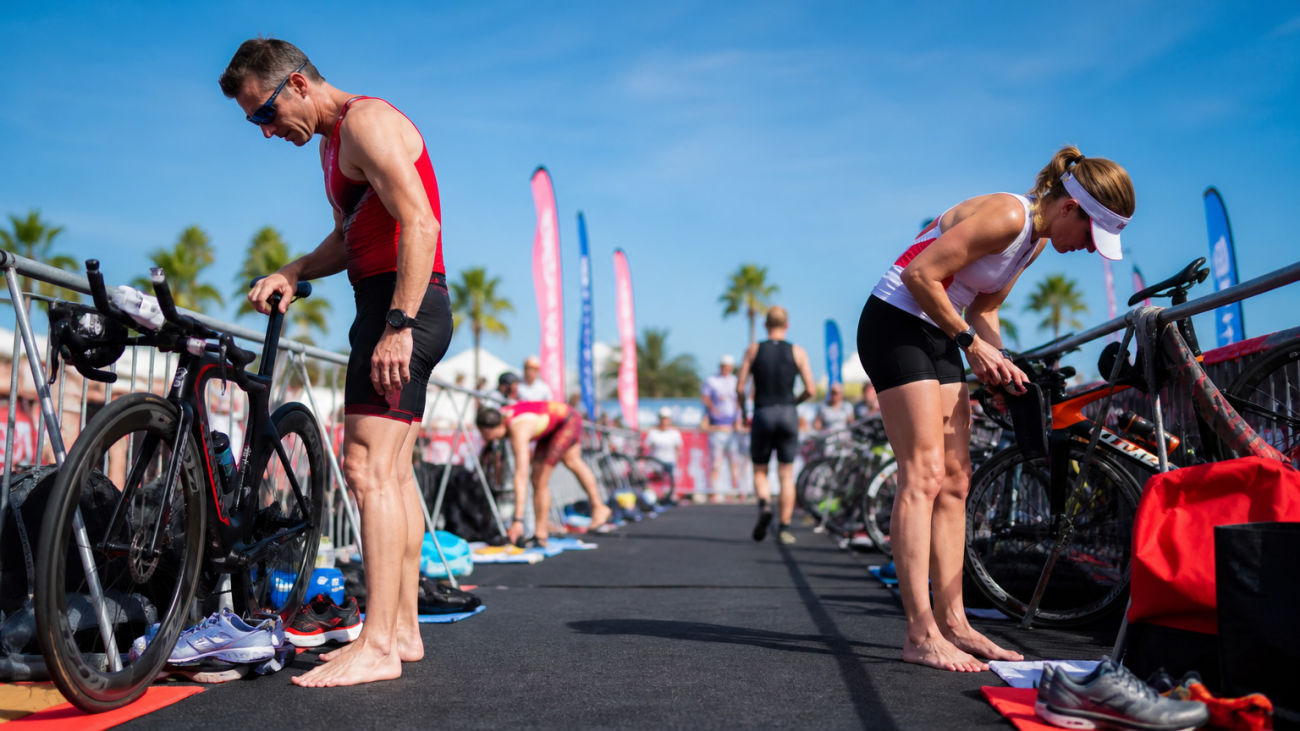
In sprint and Olympic triathlons, athletes typically use a single, shared transition area. Athletes lay out their gear next to their assigned bike rack spot, allowing for quick access during T1 and T2. The average distance athletes must run while carrying their gear in these races is minimal, usually just a few metres from the swim exit to their bike rack. This layout is designed for efficiency, enabling athletes to transition swiftly between the swim and bike segments.
and Iron-Distance Races
For 70.3 and Iron-distance races, transitions become more complex. These events often employ a bag system, where athletes use T1 and T2 bags that include all necessary gear. This system accommodates the longer distances and the need for additional clothing or nutrition. Typically, athletes must run a greater distance—up to 100 metres or more—to reach their designated area, which adds to the transition time. The added complexity means that preparation is critical, as athletes must quickly locate their bags and change efficiently in the transition tents.
Point-to-Point and Split Transitions
Some races feature point-to-point or split transitions, where the swim, bike, and run segments occur in different locations. In these scenarios, athletes may need to transport their gear from one area to another, which requires careful planning and organisation. The distances can vary significantly, often requiring athletes to run several hundred metres with their gear, making it essential to practise carrying equipment effectively.
Layout Differences
The layout differences between these race types highlight the need for tailored strategies. For example, in a sprint triathlon, the short distance from the swim to the bike may allow for a more relaxed transition, while in Iron-distance events, the additional running distance and gear management necessitate a more structured approach. Athletes should familiarise themselves with the transition area layout prior to race day to minimise confusion and maximise efficiency[5][1].
Essential Gear and Transition Area Setup
Having the right gear and a well-organised transition area can significantly impact your race time. Essential items for your transition setup include:
- Transition Towel: Use this to dry off and wipe your feet before putting on shoes.
- Bike Shoes: Ensure these are easily accessible for a quick change.
- Helmet: This must be worn and securely fastened from the moment you touch your bike in T1 until you rack it again in T2[3].
- Elastic Laces: These allow you to slip into your running shoes quickly without tying knots.
- Race Belt: Pre-pin your race number to this belt for easy attachment while exiting T2[2].
Visual-Friendly Checklist of Placement Order
- Transition Towel - Lay it down first for quick access.
- Bike Shoes - Position them next to the towel.
- Helmet - Place it upside down with sunglasses inside on your bike's handlebars.
- Elastic Laces - Keep your running shoes near your bike shoes.
- Race Belt - Ensure it’s ready to grab as you run out of T2.
What Not to Bring
Avoid clutter in your transition area to save time and space. Here are items to leave at home:
- Glass Containers: These are prohibited and can lead to disqualification[4].
- Unnecessary Gear: Items like extra clothing or food can slow you down. Stick to essentials to minimise search time[1].
- Non-Essential Tools: Avoid bringing tools or equipment that are not needed for the race to keep your area organised.
This setup is particularly effective in sprint and Olympic events where quick transitions are critical. Practising this layout can help ensure you are familiar with where everything is, allowing for a smoother transition experience on race day.
T1: Swim-to-Bike Transition Strategies
Efficiently transitioning from the swim to the bike is crucial for minimising time in T1. Here’s a breakdown of the sequence and time-saving techniques to implement.
Sequence of Actions
Exiting the Water: As you leave the water, keep your swim cap and goggles on until you reach your transition area. This helps avoid misplacing them and saves time later[2].
Wetsuit Stripping: Start unzipping your wetsuit while you run towards the transition area. As you approach your bike, you can begin stripping it off. This is often referred to as “wetsuit stripping” and can save precious seconds.
Goggles Placement: Once you reach your transition spot, remove your goggles and cap. Place them inside your helmet along with your sunglasses to keep everything organised[2].
Helmet and Bike: Place your helmet upside-down on your aerobars with the sunglasses inside. Buckle your helmet before touching your bike. Remember that the helmet must be securely fastened at all times while you have possession of your bike[3].
Running with Wetsuit Dangling: If your wetsuit is still partially on, run with it dangling. This keeps your hands free to handle your gear without wasting time trying to fully remove the wetsuit before reaching your bike[2].
Mount Line: After securing your helmet, grab your bike and run to the mount line. It is essential to walk or run your bike to this line before mounting, as riding in the transition area can lead to penalties[4].
Time-Saving Techniques
Practice Transitions: Regularly practise your swim-to-bike transitions. Mock races and brick workouts can help build neuromuscular efficiency, ensuring you move smoothly through T1[6].
Know the Rules: Familiarise yourself with drafting rules. In draft-illegal races, the draft zone is 12 meters, and you have 25 seconds to complete a legal pass[3][8]. Understanding these rules can help you strategise your positions on the course.
Be Aware of Penalties: Common penalties in T1 can arise from not following the mount line rules or not wearing your helmet properly. Always ensure you are aware of these to avoid time loss[3][4].
By mastering these strategies and understanding the importance of each step, you can significantly reduce your transition time and improve your overall race performance.
T2: Bike-to-Run Transition Strategies
Transitioning from bike to run in T2 requires a well-planned approach to minimise time and maximise efficiency. Here are key steps to execute during this critical phase.
Sequence of Actions
Dismount: As you approach the dismount line, be ready to unclip your shoes and prepare to dismount your bike. Ensure your helmet remains fastened until your bike is racked[2].
Rack Bike: After dismounting, quickly walk or run your bike to your designated rack spot. Be mindful of the transition area rules which prohibit riding your bike in this section[4]. Once at your rack, place your bike securely before unclipping your helmet.
Change to Run Shoes: Swap your cycling shoes for running shoes. Using elastic laces can save time, as they allow you to slip into your shoes without needing to tie knots. This simple adjustment can reduce your transition time significantly—potentially cutting seconds off your overall time[2].
Grab Visor/Hat/Race Belt: As you exit T2, quickly grab your visor or hat and race belt. Having your race number already pinned to the belt can facilitate a faster attachment while you’re on the move[2].
Fast Feet Technique
The “fast feet” technique involves maintaining a quick cadence as you transition from bike to run. This technique can help you avoid the common mistake of starting your run too fast off the bike, which often leads to fatigue. Practising this can improve your efficiency and overall run performance[6].
Hydration and Nutrition Handoff
During T2, it's essential to manage hydration and nutrition effectively. If you have a hydration pack or nutrition setup, ensure it’s easily accessible as you transition. Practice grabbing these items while maintaining your speed. This is effective if you have planned your hydration strategy in advance, allowing you to focus on the run without unnecessary delays.
Example Timing
In practice scenarios, athletes using elastic laces and a pre-pinned race belt can reduce their T2 time by approximately 10-20 seconds compared to traditional methods. While this may seem minor, every second counts in a competitive triathlon setting.
Implementing these strategies will help streamline your T2 process, allowing for a faster transition and a smoother entry into the run segment. Practising these steps consistently will build your confidence and efficiency for race day.
Transition Training Drills and Mock Race Practice
Incorporating transition training drills and mock race practice is vital for triathletes aiming to optimise their performance. Brick workouts and specific transition drills are effective methods to enhance your transition efficiency.
Brick Workouts
Brick workouts involve completing two disciplines back-to-back, typically the bike-to-run segment. Starting with short durations, such as a 30-minute bike followed by a 5-minute run, allows you to adapt to the physical demands of transitioning. Gradually increase the duration of each segment, building up to longer workouts like a 90-minute bike ride followed by a 30-minute run. This approach helps develop neuromuscular efficiency, reducing the common mistake of starting the run too fast off the bike, which can impair overall performance[6].
Transition-Specific Drills
Focus on specific drills that mimic race conditions. Practise the sequence of actions in T1 and T2, ensuring you are familiar with the flow of your transitions. Key drills include:
- Wetsuit Stripping: Run with your wetsuit partially off to simulate the transition from swim to bike.
- Helmet and Bike Handling: Practise placing your helmet on correctly before touching your bike and running to the mount line.
- Quick Changes: Work on changing shoes swiftly, incorporating elastic laces for faster transitions.
Aim to incorporate these drills into your training at least once a week. This frequency allows for gradual improvement and helps embed the actions into muscle memory.
Mental Rehearsal and Visualisation
Mental rehearsal is a powerful tool to enhance performance. Before race day, visualise each transition, imagining the sequence of actions and the physical sensations. Coaches recommend this technique to build confidence and reduce anxiety. Picture yourself smoothly moving through T1 and T2, focusing on each step from exiting the water to starting the run. This practice can help you execute transitions more effectively and with greater ease during the actual race.
Combining brick workouts, transition-specific drills, and mental rehearsal will prepare you to tackle transitions with confidence, ultimately minimising your overall race time.
Common Transition Mistakes and How to Avoid Them
Understanding common transition mistakes can significantly enhance your race performance. Here are frequent errors and strategies to avoid them.
Poor Gear Placement
One of the most common mistakes is misplacing gear in the transition area. This can lead to unnecessary searching and wasted time. To prevent this, arrive early on race day to set up your transition area, noting landmarks for your rack position. Practising the flow from swim entrance to your spot and exits will help you familiarise yourself with your setup[1].
Forgetting Helmet Buckle
Failing to buckle your helmet before touching your bike can lead to penalties. USA Triathlon rules state that the helmet must be worn and fastened from the moment you remove your bike from the rack until it is racked again after the bike leg[3]. Always ensure your helmet is securely fastened before you touch your bike to avoid disqualification.
Slow Wetsuit Removal
Taking too long to remove your wetsuit can cost you valuable seconds. Practice wetsuit stripping by unzipping while running towards the transition area. By the time you reach your bike, you can begin removing it, saving time and keeping your hands free for gear management[2].
Prevention Checklist
To help avoid these mistakes, consider the following checklist:
- Helmet Check: Ensure your helmet is on and buckled before touching your bike.
- Gear Layout: Organise your transition area with a clear sequence for easy access.
- Wetsuit Practice: Regularly practise wetsuit removal during training to improve your efficiency.
Real-Race Penalties
Be aware that penalties can significantly impact your race time. For example, riding your bike inside the transition area can lead to a penalty, as athletes must walk or run their bike to the mount line[4]. Familiarising yourself with these rules can prevent costly mistakes.
Ideal vs Realistic Transition Times
Transition times vary by race distance. In sprint triathlons, ideal transition times are typically around 30-60 seconds, while Olympic distance events may see transitions of 1-2 minutes. For 70.3 races, aim for 2-3 minutes, considering the additional gear changes required[7]. Understanding these benchmarks can help set realistic goals for your race day performance.
By recognising these common mistakes and implementing preventative measures, you can streamline your transitions and enhance your overall triathlon experience.
Triathlon Transition Glossary: Key Terms Explained
Understanding key terms related to triathlon transitions can significantly enhance your performance. Here’s a concise glossary that covers essential terms you'll encounter in T1 and T2.
Flying Mount
A technique where athletes mount their bike while it's in motion, typically after the mount line. This method can save time but requires practice to execute safely.
T2 Towel
A towel placed in the transition area during T2 for quick drying of feet before putting on running shoes. Keeping it handy can streamline your transition.
Mount Line
The designated line in the transition area where athletes must mount their bikes. Riding before this line can lead to penalties, as athletes must walk or run their bike to it[4].
Transition Bag
Used in longer races, transition bags store your gear for T1 and T2. They help keep your equipment organised, especially in events like Ironman races where multiple items are needed[5].
Race Belt
A belt that holds your race number, allowing for quick attachment during T2. Pre-pinning your number can save seconds when transitioning to the run[2].
Elastic Laces
Laces that allow shoes to be slipped on easily without tying. Using elastic laces can significantly reduce your shoe change time in T2[2].
Brick Session
A training workout that combines two disciplines, usually bike-to-run. Practising brick sessions helps prepare your body for the transition demands during a race[6].
Wetsuit Stripping
The process of removing your wetsuit quickly after the swim. Practice this technique to improve efficiency in T1 and avoid wasting time[2].
Dismount Line
The point in the transition area where athletes must dismount their bike. Failing to dismount before this line can result in penalties[4].
Transition Area
The designated space where athletes prepare for the next leg of the race. Familiarising yourself with this area can help minimise transition time[1].
Helmet Buckle
The requirement to securely fasten your helmet before touching your bike in T1. Not doing so can lead to disqualification[3].
Common Transition Mistakes
Understanding typical errors, like misplacing gear or failing to practice wetsuit removal, can help you avoid costly penalties and save time during transitions.
Ideal Transition Times
For sprint triathlons, aim for 30-60 seconds in transitions, while Olympic distances may require 1-2 minutes. For 70.3 races, target 2-3 minutes to accommodate additional gear changes[7].
Conclusion
Familiarising yourself with these terms and their implications can enhance your transition strategy, leading to improved race performance. Practising these concepts during training will help build confidence for race day.
Conclusions
Master these priorities first. Organise your transition area with clear landmarks so you locate gear without searching. Pre-pin your race number to an elastic race belt and fit elastic laces to cut T2 by 10-20 seconds. Schedule one brick workout weekly, starting at 30 minutes on the bike plus five minutes running, then increase duration to train neuromuscular efficiency. Visualise each sequence the night before to reduce anxiety and execute smoother handoffs. These steps work best when you arrive early and rehearse under race-like pressure; they matter less if you skip consistent practice.
Next, review the Sprint Triathlon Training Plans to build these habits into your first-race schedule.
Still wondering?
What is the ideal transition time for a triathlon?
Sprint triathlons see ideal transition times of 30 to 60 seconds. Olympic distance races often run between one and two minutes. These figures represent 1.0 percent of total race time yet carry 7.5 percent importance in final order among professionals[7]. The reader can check personal splits against these benchmarks after each event.
Triathlon transition tips for Beginners
Arrive early on race morning in Boulder to locate your rack spot and note landmarks. Keep the swim cap and goggles on while running from the water then unzip the wetsuit on the move[2]. Place the helmet open and upside-down on the aerobars with sunglasses inside so the reader can buckle it before removing the bike[3]. This sequence works when the reader rehearses the full flow once a week; it fails if gear sits scattered.
How to speed up triathlon transitions
Practise brick workouts that begin with a 30-minute bike followed by a five-minute run and increase duration over time[6]. Pre-pin the race number to an elastic belt and fit elastic laces to save 10 to 20 seconds in T2. The reader must walk the bike to the mount line and never ride inside the transition area or risk a penalty[4]. These steps prove effective only after the reader has visualised each handoff the night before.
Triathlon transition swim to bike
Leave the swim cap and goggles in place while exiting the water and unzip the wetsuit during the run into T1[2]. Set the helmet open on the aerobars with sunglasses already inside then buckle it before touching the bike to meet USA Triathlon rules[3]. The reader can strip the wetsuit fully at the rack and slip on cycling shoes in one motion. This order succeeds in draft-illegal races when the reader has practised the exact path from swim exit to mount line.
Triathlon transition checklist
Lay out helmet, sunglasses, race belt and shoes next to the assigned rack spot in a single shared transition area for sprint or Olympic events[5]. Bring no glass containers to avoid disqualification[4]. Confirm the helmet is fastened before removing the bike and rack it again before unclipping in T2[3][2]. The reader should rehearse this exact list during one weekly brick session to embed the sequence.
Best transition tips for triathlon
Use a race belt with the number already pinned so the reader can attach it while running out of T2[2]. Keep transitions under two minutes in Olympic distance by visualising the full sequence the evening before. Practise flying mounts only after the mount line and dismount before the dismount line to stay penalty-free[4]. These actions deliver results when the reader limits gear to essentials and arrives early at USA Triathlon events.
What is the 80/20 rule for triathlon?
The 80/20 rule prescribes that athletes spend 80 percent of weekly training time below the first ventilatory threshold and 20 percent at high intensity[9]. This training split builds the aerobic base needed to hold steady effort through both transitions. The reader can track personal sessions with a heart-rate monitor to verify the zones. It applies best to early-season plans and matters less during final taper weeks.
Sources consulted
- 1
- How to Improve Your Transition Times | USA Triathlon
- 2
- Tips & Tricks for a Smooth Transition | USA Triathlon
- 3
- USA Triathlon Multisport Competition Rules v.2026.01.01
- 4
- Multisport Rules | USA Triathlon
- 5
- Your Step-By-Step Guide to Triathlon Transitions
- 6
- Maximize Your Run Off the Bike | USA Triathlon
- 7
- Swim, Bike, or Run: Which Sport Determines Who Will Win a Triathlon?
- 8
- World Triathlon approves updates on the Competition Rules
- 9
- 80/20 Triathlon Training: The What, Why, and How